How to

🔥 Building an email automation system with React Flow and Resend 🎉

Creating an email automation system to message people with a sequence of messages every 10 minutes.

Nevo David
Nevo DavidJuly 31, 2023

TL;DR

In this tutorial, you’ll learn how to build an email automation system to message people with a sequence of messages every 10 minutes. ⏰

  • Build a client diagram representing the flow of emails with React Flow. ⿳
  • Send email according to the flow every 10 minutes with Resend. 📝

Novu – the first open-source notification infrastructure

Just a quick background about us. Novu is an open-source notification infrastructure. We basically help to manage all the product notifications. It can be In-App (the bell icon like you have in the Dev Community – Websockets), Emails, SMSs and so on.

We actually implemented ReactFlow and Resend in our project as well

I would be super happy if you could give us a star! It will help me to make more articles every week 🚀
https://github.com/novuhq/novu

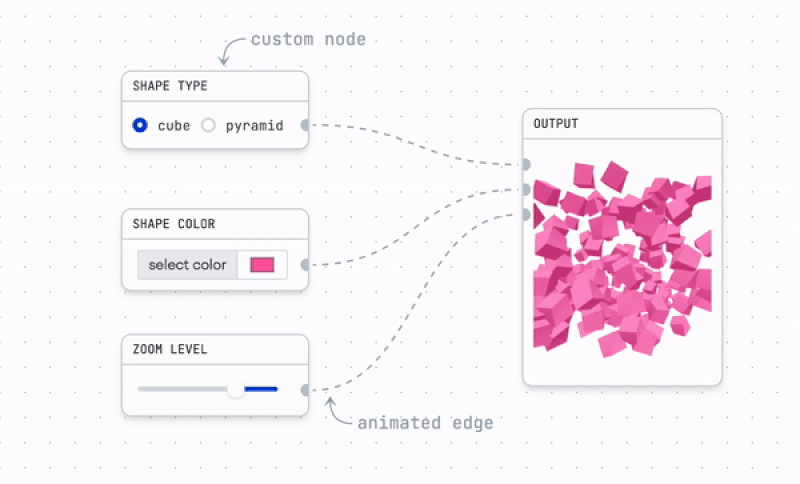
ReactFlow to build your flow ✅

ReactFlow is an easy-to-use library for building anything from static diagrams to data visualizations and even complex visual editors. It is highly customizable and provides various in-built features such as dragging nodes around, zooming and panning, selecting multiple nodes and edges, and many more by default.

In this article, you’ll learn how to add interactive diagrams to your React apps with ReactFlow and how to send emails with Resend by building an email outreach application.

The application accepts various email content via nodes in ReactFlow and sends them as email messages.

Let’s set it up 🔥

Here, I’ll walk you through installing the package dependencies required for this project; using Next.js v12.

1npx create-next-app@12 email-outreach-app

Run the code snippet below to install the ReactFlow and Resend packages.

1npm install reactflow resend

Finally, install React Redux and Redux Toolkit packages to enable us to manage states within the application.

1npm install react-redux @reduxjs/toolkit

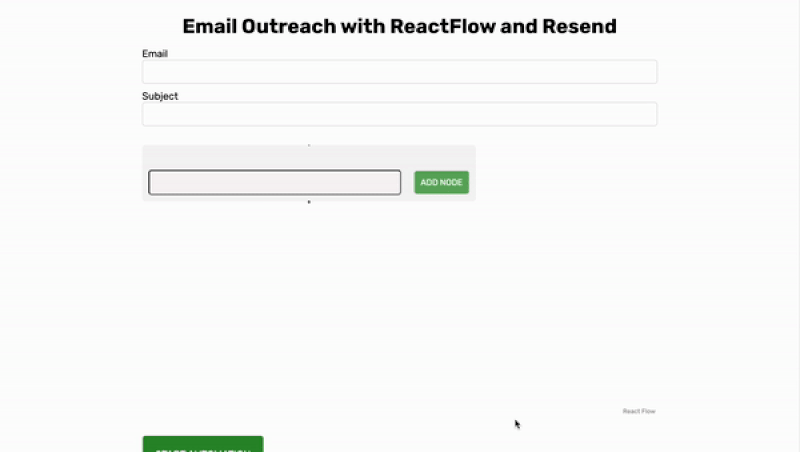
Putting the basic page layout 📟

Here, we’ll create a form that accepts an email, a subject, and a series of nodes containing the messages you want to send to the recipient. The messages will be sent at an interval of 30 minutes.

First, copy the code snippet below into the pages/index.js file

1import Head from "next/head";
2import { useState } from "react";
3
4export default function Home() {
5    const [email, setEmail] = useState("");
6    const [subject, setSubject] = useState("");
7
8    const handleSubmit = (e) => {
9        e.preventDefault();
10        console.log({ email, subject });
11        setEmail("");
12        setSubject("");
13    };
14
15    return (
16        <>
17            <Head>
18                <title>Email Outreach - Resend & ReactFlow</title>
19                <meta name='description' content='Generated by create next app' />
20                <meta name='viewport' content='width=device-width, initial-scale=1' />
21                <link rel='icon' href='/favicon.ico' />
22            </Head>
23            <main className='main'>
24                <header className='header'>
25                    <h1 style={{ marginBottom: "15px" }}>
26                        Email Outreach with ReactFlow and Resend
27                    </h1>
28                </header>
29
30                <form className='form' onSubmit={handleSubmit}>
31                    <label htmlFor='email'>Email</label>
32                    <input
33                        type='email'
34                        name='email'
35                        id='email'
36                        className='input'
37                        value={email}
38                        required
39                        onChange={(e) => setEmail(e.target.value)}
40                    />
41
42                    <label htmlFor='subject'>Subject</label>
43                    <input
44                        type='text'
45                        name='subject'
46                        id='subject'
47                        className='input'
48                        value={subject}
49                        required
50                        onChange={(e) => setSubject(e.target.value)}
51                    />
52                    {/* --- 👉🏻 ReactFlow Component placeholder 👈🏼 --- */}
53                    <button className='submitBtn'>START AUTOMATION</button>
54                </form>
55            </main>
56        </>
57    );
58}

The code snippet above creates a simple form that accepts the recipient’s email address and the subject of the email. In the upcoming section, we’ll add the ReactFlow component.

Managing states within the ReactFlow components

Before you import the ReactFlow components, let’s set up the state management library – Redux Toolkit.

💡 PS: You don’t need a state management library to use ReactFlow.

We are using Redux to enable us to track the input within the component and update the application’s state accordingly. Otherwise, you can add ReactFlow components easily.

Therefore, create a redux folder containing a nodes.js and a store.js file.

1mkdir redux
2cd redux
3touch nodes.js store.js

Copy the code snippet below into the redux/nodes.js file.

1import { createSlice } from "@reduxjs/toolkit";
2
3const addNode = (object) => {
4    const newNode = {
5        id: `${Number(object.id) + 1}`,
6        type: "task",
7        position: { x: 0, y: object.position.y + 120 },
8        data: { value: "" },
9    };
10    return newNode;
11};
12
13const addEdge = (object) => {
14    const newEdge = {
15        id: `${object.id}->${Number(object.id) + 1}`,
16        source: `${object.id}`,
17        target: `${Number(object.id) + 1}`,
18    };
19    return newEdge;
20};

The code snippet above contains two functions that accept an object (the last element in the nodes array) and returns another object containing the values above.

Next, add the code snippet below the functions – in the same file.

1//below the functions (within the same file)
2//---- 👉🏻 functions 👈🏼---
3
4export const nodeSlice = createSlice({
5    name: "nodes",
6    initialState: {
7        nodes: [
8            {
9                id: "1",
10                type: "task",
11                position: { x: 0, y: 0 },
12                data: { value: "" },
13            },
14        ],
15        edges: [],
16    },
17    reducers: {
18        setNodes: (state, action) => {
19            let nodes = state.nodes;
20            state.nodes = [...state.nodes, addNode(nodes[nodes.length - 1])];
21            state.edges = [...state.edges, addEdge(nodes[nodes.length - 1])];
22        },
23        updateNodeValue: (state, action) => {
24            let nodes = [...state.nodes];
25            let objectIndex = nodes.findIndex((obj) => obj.id === action.payload.id);
26            if (objectIndex !== -1) {
27                state.nodes[objectIndex] = {
28                    ...nodes[objectIndex],
29                    data: { value: action.payload.value },
30                };
31            }
32        },
33    },
34});
35
36// Action creators are generated for each case reducer function
37export const { setNodes, updateNodeValue } = nodeSlice.actions;
38
39export default nodeSlice.reducer;
  • From the code snippet above,
    • We created two states – nodes and edges arrays. The nodes state has a single element representing the initial node in the diagram.
    • The setNodes reducer updates the nodes and edges array. It executes when the user clicks the Add button within each diagram node.
    • The updateNodeValue reducer tracks the input within each node of the diagram and updates the right node with its new value.

Add the node reducer to the store.js file.

1import { configureStore } from "@reduxjs/toolkit";
2import nodeReducer from "./nodes";
3
4export const store = configureStore({
5    reducer: {
6        nodes: nodeReducer,
7    },
8});

Finally, make the store available to the whole application by updating the _app.js file.

1import { store } from "../redux/store";
2import "../styles/globals.css";
3import { Provider } from "react-redux";
4
5export default function App({ Component, pageProps }) {
6    return (
7        <Provider store={store}>
8            <Component {...pageProps} />
9        </Provider>
10    );
11}

Congratulations! You’ve set up the states required for the diagram. Next, let’s add it to the app.

Adding the ReactFlow components

Since we are using a custom component for each node in the diagram, create a components folder containing a Task.js file.

1mkdir components
2cd components
3touch Task.js

Copy the code below into the Task.js file. The Task component represents each node in the diagram.

1import { useState } from "react";
2import { Handle, Position } from "reactflow";
3import { useSelector, useDispatch } from "react-redux";
4import { setNodes, updateNodeValue } from "../redux/nodes";
5
6export default function Task({ id }) {
7    const initialNodes = useSelector((state) => state.nodes.nodes);
8    const [value, setValue] = useState("");
9    const dispatch = useDispatch();
10
11    return (
12        <>
13            <Handle type='target' position={Position.Top} />
14            <div
15                style={{
16                    padding: "10px",
17                    backgroundColor: "#F5F5F5",
18                    borderRadius: "5px",
19                }}
20            >
21                <input
22                    className='textInput'
23                    type='text'
24                    required
25                    onChange={(e) => {
26                        setValue(e.target.value);
27                        dispatch(updateNodeValue({ id, value: e.target.value }));
28                    }}
29                    value={value}
30                />
31                {Number(id) === initialNodes.length && (
32                    <button onClick={() => dispatch(setNodes())} className='addBtn'>
33                        ADD NODE
34                    </button>
35                )}
36            </div>
37
38            <Handle type='source' position={Position.Bottom} id='a' />
39        </>
40    );
41}
  • From the code snippet above,
    • The Handle components rendered at the top and bottom connect each node to another. It has a type prop that determines whether the node is a source or target.
    • The Add Node button triggers the setNodes reducer.
    • When a user updates the content within the input field, the updateNodeValue reducer is also triggered to update the selected note with the input value.
    • Each node in the diagram has a data and an id props containing the details of that node.

Next, add the following imports to the pages/index.js file.

1import { useState, useCallback, useMemo, useEffect } from "react";
2import ReactFlow, {
3    useNodesState,
4    useEdgesState,
5    getIncomers,
6    getOutgoers,
7    addEdge,
8    getConnectedEdges,
9} from "reactflow";
10import "reactflow/dist/style.css";
11import Task from "../components/Task";
12import { useSelector } from "react-redux";

Add the code snippet below within the Home component on the pages/index.js file.

1const initialNodes = useSelector((state) => state.nodes.nodes);
2const initialEdges = useSelector((state) => state.nodes.edges);
3const [nodes, setNodes, onNodesChange] = useNodesState(initialNodes);
4const [edges, setEdges, onEdgesChange] = useEdgesState(initialEdges);
5const nodeTypes = useMemo(() => ({ task: Task }), []);
6
7useEffect(() => {
8    setNodes(initialNodes);
9    setEdges(initialEdges);
10}, [initialNodes, setNodes, initialEdges, setEdges]);
11
12const onConnect = useCallback(
13    (params) => setEdges((eds) => addEdge(params, eds)),
14    [setEdges]
15);
  • From the code snippet above,
    • The nodes and edges from the Redux state are set as the nodes and edges for the diagram using the useNodesState and useEdgesState hooks provided by ReactFlow.
    • The nodeTypes variable enables us to customise each node. Task is our custom component.
    • The onConnect function executes when you add a new node.
    • The useEffect hook runs when there are changes in the edges and the nodes.

Finally, add the ReactFlow component to the user interface as done below.

1return (
2    <form>
3        {/*---👉🏻 other form elements 👈🏼---*/}
4        <div style={{ height: "60vh", width: "100%", marginTop: "20px" }}>
5            <ReactFlow
6                nodes={nodes}
7                edges={edges}
8                onNodesChange={onNodesChange}
9                onEdgesChange={onEdgesChange}
10                onConnect={onConnect}
11                nodeTypes={nodeTypes}
12            />
13        </div>
14        <button className='submitBtn'>START AUTOMATION</button>
15    </form>
16);

Congratulations, you’ve successfully added the diagram to your application.


Resend.com to send your emails 📜

In this section, you’ll learn how to send emails with Resend by sending the inputs in each node to the email provided on the form.

Resend is an email API that enables you to send texts, attachments, and email templates easily. With Resend, you can build, test, and deliver transactional emails at scale.

One of its best features is that your messages don’t end up in the recipient’s spam box but in the recipient’s inbox.

We’ve already installed Resend at the beginning of this tutorial. Therefore, go to the Signup page and create an account.

Resend

Create an API Key and save it into a .env.local file within your Next.js project.

1RESEND_API_KEY=<place_your_API_key>

Next, create a send.js file within the pages/api folder and copy the code below into the file.

1//👇🏻 within the send.js file
2import { Resend } from "resend";
3
4// initiate the resend instance
5const resend = new Resend(process.env.RESEND_API_KEY);
6
7const timer = (time) => {
8    return new Promise((res) => {
9        setTimeout(() => res(true), time);
10    });
11}
12
13export default async function handler(req, res) {
14    const { subject, email, tasks } = req.body;
15    if (!subject || !tasks || !email) {
16        res.status(400).json({invalid: true});
17    }
18
19    for (const task of tasks) {
20        await resend.emails.send({
21            from: "name@yourcompany.dev",
22            to: [email],
23            subject,
24            text: task,
25        });
26
27        // Wait 10 minutes
28        await timer(600000);
29    }
30
31    res.status(200).json({invalid: false});
32}

The code snippet above receives the subject, recipient, and email content from the request and sends an email to the recipient via Resend.

Please be advice that there is a delay of 10 minutes between emails.

This will not be possible to be deployed to Vercel as their free package support a maximum of 10 seconds per request.

You can absolutly test it on your local machine.

In production, such a thing would need to go into a queue that sends the email every X amount of time.

Add the following functions within the pages/index.js file.

1const sendEmail = (index) => {
2    fetch("/api/send", {
3        method: "POST",
4        body: JSON.stringify({
5            email,
6            subject,
7            tasks: nodes.map(data => data.value), // map all nodes to a string array
8        }),
9        headers: {
10            "Content-Type": "application/json",
11        },
12    })
13        .then((data) => {
14            alert(`Sent to processing`);
15        })
16        .catch((err) => {
17            alert(`Encountered an error when message${index}`);
18            console.error(err);
19        });
20};

The functions above loop through the nodes in the ReactFlow diagram and sends an email containing the node’s value to the recipient at intervals.

Finally, execute the function when a user submits the form.

1const handleSubmit = (e) => {
2    e.preventDefault();
3    sendEmail();//👈🏼 Send to server
4    setEmail(""); // Reset the input
5    setSubject(""); // Reset the input
6};

Let’s wrap it up 🎁

So far, you’ve learned how to add interactive diagrams to your application with ReactFlow and send emails with Resend.

ReactFlow is a popular open-source library that enables us to build interactive and customizable flowcharts and diagrams. If you want to build an application that requires drag-and-drop functionality and customizable graphical UI elements, you should consider using ReactFlow.

The source code for this tutorial is available here:  https://github.com/novuhq/blog/tree/main/email-outreach-with-reactflow-and-resend

Thank you for reading! 🎉


Help me out!

If you feel like this article helped you understand email automation better! I would be super happy if you could give us a star! And let me also know in the comments ❤️
https://github.com/novuhq/novu

Nevo David
Nevo DavidJuly 31, 2023

Related Posts

How to

Building an Investor List App with Novu and Supabase

Building an Investor List App with Novu and Supabase

Prosper Otemuyiwa
Prosper OtemuyiwaMarch 15, 2024
How to

Implementing Internationalization in Apps: How to Translate Notifications

Implementing Internationalization in Apps: How to Translate Notifications

Prosper Otemuyiwa
Prosper OtemuyiwaMarch 1, 2024
How to

How to add In-App notifications to any web app!

Add a notification system to any app in just a few simple steps!

Sumit Saurabh
Sumit SaurabhMay 9, 2023