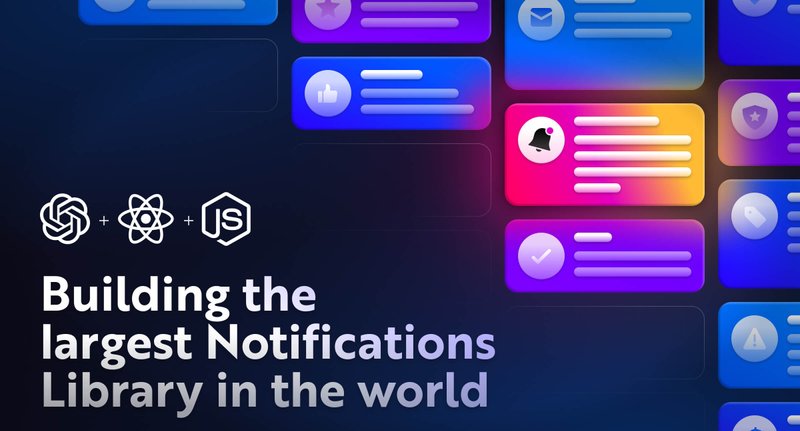
Building the largest Notifications Library in the world using ChatGPT, React, and NodeJS 🤯
I will show you how to create thousands of notifications with ChatGPT and render it with React.
TLDR;
I am going to show you how to create a notification library like on this website:
https://notifications.directory
I will show you how to create thousands of notifications with ChatGPT and render it with React.
Things you need to know
At the moment, he ChatGPT API isn’t available.
The latest model from OpenAI is “text-davinci-003”.
If you’re okay with using an older model, go ahead and give it a try!
But keep in mind that it’s not as advanced as the current ChatGPT model “text-davinci-002-render”. In this tutorial, I’m going to show you a solution that was created by someone in the open-source community. It’s a good option for now, but please keep in mind that it might not always be available. OpenAI hasn’t released its ChatGPT API yet, so this is just a temporary solution, this solution can’t be used for commercial purposes.

What data do we need?
I will teach you how to do the same things we do in The notification generator project, simplified.
We will create three hierarchies.
- Categories Website types like
- SaaS
- E-commerce
- Online marketplace
- Travel
- Etc..
- Notifications Types
- SaaS: “Payment is due”
- E-commerce: “Product out of stock”, etc…
- Notifications
- “Hi NAME, your payment is due for DATE”
- “Hi NAME, product PRODUCT_NAME is out of stock.”
To create each hierarchy, we must have the data of the previous hierarchy.
While in Novu, we store everything inside MongoDB here we will do everything with a simple array.
Novu – the first open-source notification infrastructure
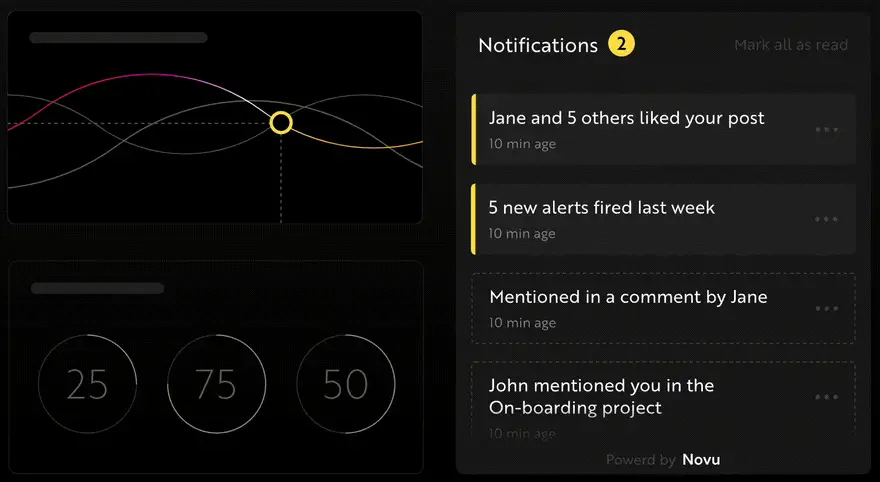
Just a quick background about us. Novu is the first open-source notification infrastructure. We basically help to manage all the product notifications. It can be In-App (the bell icon like you have in Facebook), Emails, SMSs and so on.
I would be super happy if you could give us a star! And let me also know in the comments ❤️
https://github.com/novuhq/novu
Register to ChatGPT
Go over to https://platform.openai.com/signup
Register to OpenAI, head over to this endpoint: https://chat.openai.com/api/auth/session,
and grab the accessToken from the JSON.

Setting up the project
We will start by creating the project and create our main file.
1mkdir backend
2cd backend
3npm init
4touch index.j
Let’s install our chatgpt library.
1npm install @waylaidwanderer/chatgpt-api --saveThis library uses Esm and not CommonJS. Therefore, it might be problematic for you if you try to implement it with NestJS – if you need help, let me know in the comments.
I will not separate the code into multiple files, as I want to keep it simple for the sake of this tutorial. Open index.js, and let’s start writing.
Let’s initiate our ChatGPT. As you can see, the library is using “chatgpt.hato.ai*“, a solution one of the community members found to use ChatGPT and was kind enough to deploy it on his server. While using this, your ChatGPT account will be exposed to an external resource, so please make sure you don’t add any credit card information and that you are using the free ChatGPT version.
**Please be advised that the API is limited to 10 requests per second.*
1import { ChatGPTClient } from '@waylaidwanderer/chatgpt-api'
2
3const api = new ChatGPTClient('YOUR ACCESS TOKEN FROM THE PREVIOUS STEP', {
4  reverseProxyUrl: 'https://chatgpt.hato.ai/completions',
5    modelOptions: {
6      model: 'text-davinci-002-render',
7  },
8});
Let’s create our database 🤣
1const categories = []Final result of “categories” will look like this
1[
2  {
3    "category": "SaaS",
4    "notificationTypes": [
5      {
6        "name": "Payment is due",
7        "notifications": [
8          "Hi {{name}}, your payment is due for. {{date}}"
9        ]
10      }
11    ]
12  }
13]
Your code should look like this now:
1import { ChatGPTClient } from '@waylaidwanderer/chatgpt-api'
2
3const api = new ChatGPTClient('YOUR ACCESS TOKEN FROM THE PREVIOUS STEP', {
4  reverseProxyUrl: 'https://chatgpt.hato.ai/completions',
5    modelOptions: {
6      model: 'text-davinci-002-render',
7  },
8});
9
10const notifications = [];
Let’s write the code that will generate all the categories.
We want the prompt and the result to look like this:
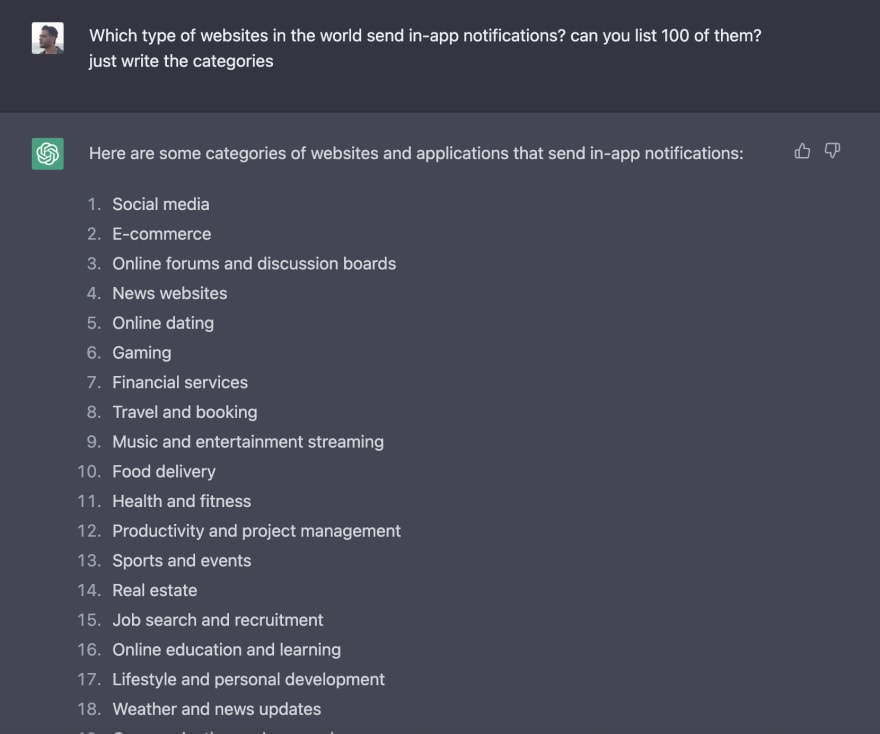
The thing is that everything will come to us as a plain text.
We need a function that will create an array from the list.
I have created a quick one.
If you have something more efficient, let me know in the comments:
1const extractNumberedList = (text) => {
2    return text.split("\n").reduce((all, current) => {
3        const values = current.match(/\d+\.(.*)/);
4        if (values?.length > 1) {
5            return [...all, values[1].trim()];
6        }
7
8        return all;
9    }, []);
10}
Now the fun part.
We need all the possible categories, then run it through our function and map it to our database:
1const res = await api.sendMessage('Can you list 50 types of websites in the world send in-app notifications? just the category');
2categories.push(...extractNumberedList(res.response).map(p => ({category: p, notificationTypes: []})));
Now we will iterate over the categories and start adding content to them. I am not going to use functional programming here for the first part.
I will use the “for loop” as it’s easier with async / await:
1for (const category of categories) {
2
3}
Let’s start to create our notification types:

1for (const category of categories) {
2    const notificationTypesRes = await api.sendMessage(`I have a website of type ${category}, What kind of notifications should I sent to my users? can you just write the type without context? give me 20`);
3  const notificationTypes = extractNumberedList(res.response).map(p => ({name: p, notifications: []}));
4}
And now, let’s add our notifications:

1for (const category of categories) {
2  // get all the notifications type
3    const notificationTypesRes = await api.sendMessage(`I have a website of type ${category}, What kind of notifications should I sent to my users? can you just write the type without context? give me 20`);
4  // parse all the notification type and map them
5  const notificationTypes = extractNumberedList(notificationTypesRes.response).map(p => ({name: p, notifications: []}));
6  // get all the notifications for the notification type
7  const notifications = await Promise.all(notificationTypes.map(async p => {
8        const notificationRes = await api.sendMessage(`I have built a system about "${category}" and I need to create in-app notifications about "${notificationType}", can you maybe write me a 20 of those? just the notification without the intro, use lower-case double curly braces with no spaces and underscores for the variables, and avoid using quotation when writing the notifications`);
9        return {
10            ...p,
11            notifications: extractNumberedList(notificationRes.response)
12        }
13    }));
14  // push it to the main array
15    notificationTypes.notifications.push(...notifications);
16}
The final code will be looking like this:
1import { ChatGPTClient } from '@waylaidwanderer/chatgpt-api'
2
3const api = new ChatGPTClient('YOUR ACCESS TOKEN FROM THE PREVIOUS STEP', {
4  reverseProxyUrl: 'https://chatgpt.hato.ai/completions',
5    modelOptions: {
6      model: 'text-davinci-002-render',
7  },
8});
9
10const categories = [];
11
12const extractNumberedList = (text) => {
13    return text.split("\n").reduce((all, current) => {
14        const values = current.match(/\d+\.(.*)/);
15        if (values?.length > 1) {
16            return [...all, values[1].trim()];
17        }
18
19        return all;
20    }, []);
21}
22
23const res = await api.sendMessage('Can you list 50 types of websites in the world send in-app notifications? just the category');
24categories.push(...extractNumberedList(res.response).map(p => ({category: p, notificationTypes: []})));
25
26for (const category of categories) {
27  // get all the notifications type
28    const notificationTypesRes = await api.sendMessage(`I have a website of type ${category}, What kind of notifications should I sent to my users? can you just write the type without context? give me 20`);
29  // parse all the notification type and map them
30  const notificationTypes = extractNumberedList(notificationTypesRes.response).map(p => ({name: p, notifications: []}));
31  // get all the notifications for the notification type
32  const notifications = await Promise.all(notificationTypes.map(async p => {
33        const notificationRes = await api.sendMessage(`I have built a system about "${category}" and I need to create in-app notifications about "${notificationType}", can you maybe write me a 20 of those? just the notification without the intro, use lower-case double curly braces with no spaces and underscores for the variables, and avoid using quotation when writing the notifications`);
34        return {
35            ...p,
36            notifications: extractNumberedList(notificationRes.response)
37        }
38    }));
39  // push it to the main array
40    notificationTypes.notifications.push(...notifications);
41}
It can run in the background forever 🥳
We can quickly move it to a separate task / cron / queue, but we will not do it here.
While this thing is running in the background, let’s add here the API that our frontend can use
Let’s go back to our command line and write:
1npm install express --saveWe will do the simplest thing and just serve our categories variable.
Feel free to take it to the next level with an actual database:
1import express from 'express';
2const app = express()
3const port = 3000
4
5app.get('/', (req, res) => {
6  return categories;
7})
8
9app.listen(port, () => {
10  console.log(`Example app listening on port ${port}`)
11})
And the complete code is as follows:
1import { ChatGPTClient } from '@waylaidwanderer/chatgpt-api';
2import express from 'express';
3
4const categories = [];
5const app = express();
6const port = 3000;
7
8const api = new ChatGPTClient('YOUR ACCESS TOKEN FROM THE PREVIOUS STEP', {
9  reverseProxyUrl: 'https://chatgpt.hato.ai/completions',
10    modelOptions: {
11      model: 'text-davinci-002-render',
12  },
13});
14
15const extractNumberedList = (text) => {
16    return text.split("\n").reduce((all, current) => {
17        const values = current.match(/\d+\.(.*)/);
18        if (values?.length > 1) {
19            return [...all, values[1].trim()];
20        }
21
22        return all;
23    }, []);
24}
25
26app.get('/', (req, res) => {
27  return categories;
28});
29
30app.listen(port, () => {
31  console.log(`Example app listening on port ${port}`)
32});
33
34const res = await api.sendMessage('Can you list 50 types of websites in the world send in-app notifications? just the category');
35categories.push(...extractNumberedList(res.response).map(p => ({category: p, notificationTypes: []})));
36
37for (const category of categories) {
38  // get all the notifications type
39    const notificationTypesRes = await api.sendMessage(`I have a website of type ${category}, What kind of notifications should I sent to my users? can you just write the type without context? give me 20`);
40  // parse all the notification type and map them
41  const notificationTypes = extractNumberedList(notificationTypesRes.response).map(p => ({name: p, notifications: []}));
42  // get all the notifications for the notification type
43  const notifications = await Promise.all(notificationTypes.map(async p => {
44        const notificationRes = await api.sendMessage(`I have built a system about "${category}" and I need to create in-app notifications about "${notificationType}", can you maybe write me a 20 of those? just the notification without the intro, use lower-case double curly braces with no spaces and underscores for the variables, and avoid using quotation when writing the notifications`);
45        return {
46            ...p,
47            notifications: extractNumberedList(notificationRes.response)
48        }
49    }));
50  // push it to the main array
51    notificationTypes.notifications.push(...notifications);
52}
NODE.JS ✅
Now let’s move over to react to display all of our categories.
I will do the simplest thing of aggregating everything inside of a <ul>
Let’s right some bash commands:
1cd ..
2npx create-react-app frontend
3cd frontend
I will be using axios to get all the results from the database, feel free to use fetch / react-query etc…
1npm install axiosLet’s open our main component at “src/App.js” and add some imports
1import {useState, useCallback, useEffect} from 'react';
2import axios from 'axios';
Let’s open our main component at “src/App.js” and add a new state that will contain all of our database from the server:
1const [categories, setCategories] = useState([]);And now, we will write the function that will get all the information from the server
1const serverInformation = useCallback(async () => {
2    const {data} = await axios.get('http://localhost:3000');
3    setCategories(data);
4}, []);
Add it to our useEffect, that will run as soon as the component is loaded
1useEffect(() => {
2    serverInformation();
3}, []);
And now, we will render everything on the screen
1<ul>
2    {categories.map(cat => (
3        <li>
4            {cat.category}
5            <ul>
6                {cat.notificationTypes.map(notificationType => (
7                    <li>
8                        {notificationType.name}
9                        <ul>
10                            {notificationType.notifications.map(notification => (
11                                <li>
12                                    {notification}
13                                <li>
14                            )}
15                        </ul>
16                    <li>
17                )}
18            </ul>
19        <li>
20    )}
21</ul>
And that’s it! We have rendered the entire list!!!
The full code of App.js would look like this:
1import {useState, useCallback, useEffect} from 'react';
2import axios from 'axios';
3
4function App() {
5    const [categories, setCategories] = useState([]);
6
7    useEffect(() => {
8        serverInformation();
9    }, []);
10
11    const serverInformation = useCallback(async () => {
12        const {data} = await axios.get('http://localhost:3000');
13        setCategories(data);
14    }, []);
15
16    return (
17        <ul>
18            {categories.map(cat => (
19                <li>
20                    {cat.category}
21                    <ul>
22                        {cat.notificationTypes.map(notificationType => (
23                            <li>
24                                {notificationType.name}
25                                <ul>
26                                    {notificationType.notifications.map(notification => (
27                                        <li>
28                                            {notification}
29                                        <li>
30                                    )}
31                                </ul>
32                            <li>
33                        )}
34                    </ul>
35                <li>
36            )}
37        </ul>
38    );
39}
Of course, this is the short version of the frontend.
You can find the complete frontend code here:
I hope you have learned something. Until next time 😎
Help me out!
If you feel like this article helped you, I would be super happy if you could give us a star! And let me also know in the comments ❤️
https://github.com/novuhq/novu


