Building An E-Commerce Store With NextJS
Learn how to build an e-commerce store where customers can purchase products and make payments.

In this tutorial, you’ll learn how to build an e-commerce store where customers can purchase products and make payments via Stripe. After a successful payment, an email notification is sent to the customer, and an in-app notification to the Admin user. The Admin user can also create and delete products within the application.
To build this application, we’ll use the following tools:
- Appwrite – for authenticating users, as well as saving and retrieving product details.
- Next.js – for creating the application’s user interface and backend.
- Novu – for sending email and in-app notifications.
- React Email – for creating email templates.
- Stripe – for integrating a payment checkout to the application.

Building the application interface with Next.js
The application pages are divided into two parts based on the roles assigned to the users. Customers can access the Home page and sign in to the application before making payments. Admin users can access all pages, including a sign-in page and a dashboard page where they can add and remove products.
Now, let’s build the application.

Create a new Next.js Typescript project by running the code snippet below:
Next, install React Icons and the Headless UI package. React Icons allows us to use various icons within the application, while Headless UI provides easy-to-use modern UI components.
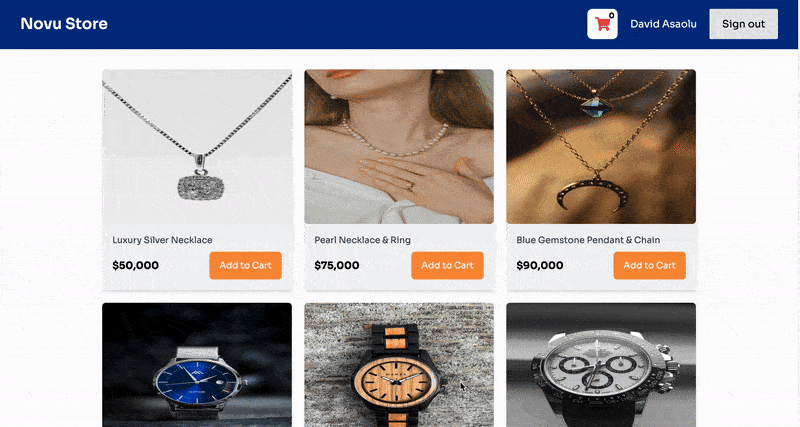
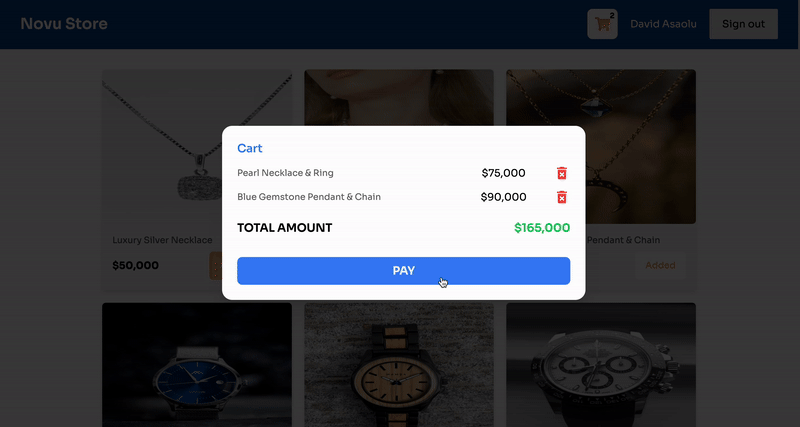
Copy this code snippet from the GitHub repository into the app/page.tsx file. It renders a list of products on the screen and allows users to select items in a cart, similar to the image below.

Create a login route that enables users to sign using their GitHub account. Copy the code snippet below into the app/login/page.tsx file.

When users click the Sign in button, it redirects them to the GitHub authentication page and prompts them to sign in to the application. You’ll learn how to do this with Appwrite shortly.
Next, let’s create the admin pages. Add an admin folder containing a login and dashboard route within the app folder.
Add a page.tsx file within the dashboard and login folders, and copy the code snippet below into the login/page.tsx file.
The code snippet above renders a form that accepts the Admin’s email and password, validates the credentials, and then logs the user into the application.

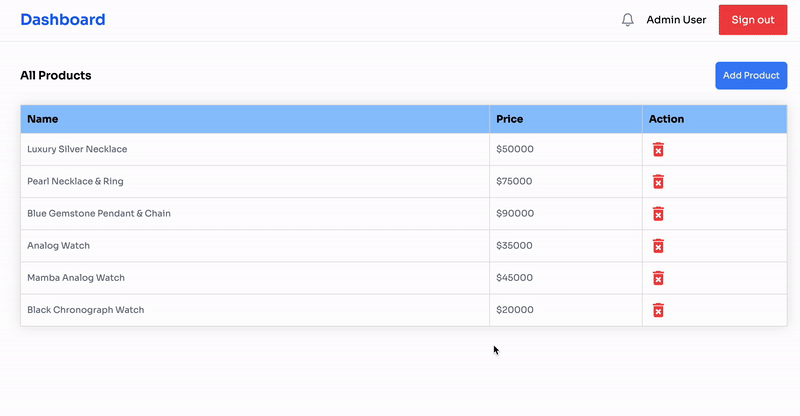
The Admin dashboard page renders the available products and allows the Admin user to add and delete products from the application. Copy this code snippet into the dashboard/page.tsx file to create the user interface.

Congratulations! You’ve built the application interface. In the upcoming sections, you’ll learn how to connect the application to an Appwrite backend and send data between the client and the server.
How to add Appwrite to a Next.js application
Appwrite is an open-source backend service that enables you to create secure and scalable software applications. It offers features such as multiple authentication methods, a secure database, file storage, cloud messaging, and more, which are essential for building full-stack applications.
In this section, you’ll learn how to set up an Appwrite project, including features such as authentication, database, and file storage.
First, visit Appwrite Cloud, and create an account and organization for your projects.
Next, create a new project and select your preferred region for hosting the project.

Select Web as the platform SDK for the application.

Follow the steps displayed on the screen. Since you’re currently building in development mode, you can use the wildcard (*) as your hostname and change it to your domain name after deploying the application.

Install the Appwrite client SDK within your Next.js project.
Finally, create an appwrite.ts file within your Next.js app folder and copy the code snippet below into the file to initialize Appwrite.
Setting up GitHub Authentication with Appwrite
Here, you’ll learn how to set up GitHub and Email/Password authentication with Appwrite. Email/Password authentication is already configured by default, so let’s focus on setting up GitHub authentication.
Before we proceed, you need to create a GitHub OAuth application using your GitHub account. Appwrite will require the client ID and secrets to set up GitHub authentication.

Enable Appwrite’s GitHub authentication method by selecting Auth from the sidebar menu and navigating to the Settings tab.

Copy your GitHub client ID and secret into the Appwrite’s GitHub OAuth settings.

Finally, ensure you copy the URI generated by Appwrite into your GitHub app settings.

Setting up Appwrite Database
Select Databases from the sidebar menu and create a new database. You can name it novu store.

Next, create a products collection. It will contain the lists of products within the application.

Add name, price, and image attributes to the collection.

Under the Settings tab, update the permissions to allow every user to perform CRUD operations. However, you can change this after deploying the application to ensure that only authenticated users can perform various actions.

Finally, copy your project, database, and collection IDs into an .env.local file. This keeps your credentials safe and allows you to reference each value from its environment variables.
Setting up Appwrite Storage
Select Storage from the sidebar menu and create a new bucket that will hold all the product images.

Under the Settings tab, update the Permissions to allow any user for now.

Set the acceptable file formats. Since we are uploading images, you can select the .jpg and .png file formats.

Finally, copy your bucket ID into .env.local file.
Congratulations! You’ve successfully configured Appwrite. We can now start interacting with its various features.
How to perform CRUD operations with Appwrite
In this section, you’ll learn how to create, retrieve, and delete products from Appwrite. Users need to be able to view existing products before making a purchase, while Admin users should have the permission to add and delete products from the application.
First, create a utils.ts file within the Next.js app folder. This file will contain all Appwrite database interactions, which you can then import into the necessary pages.
Saving products to Appwrite
Recall that the products collection has three attributes: name, image, and price. Therefore, when adding products to the database, you need to first upload the product’s image, retrieve its URL and ID from the response, and then upload the URL as the product’s image attribute, using the image’s storage ID for the product data.
Here is the code snippet that explains this:
The code snippet above uploads the image to Appwrite’s cloud storage and retrieves the exact image URL using the bucket ID, image ID, and project ID. Once the image is successfully uploaded, its ID is used in the product’s data to enable easy retrieval and reference.
Retrieving products from Appwrite
To fetch the products from Appwrite, you can execute the function below within the React useEffect hook when the page loads.
The fetchProducts function returns all the data within the products collection.
Deleting products from Appwrite
Admin users can also delete a product via its ID. The deleteProduct function accepts the product’s ID as a parameter and deletes the selected product from the database, including its image, since they use the same ID attribute.
How to authenticate users with Appwrite
In the previous sections, we’ve configured the GitHub authentication method. Here, you’ll learn how to handle user sign-ins into the application.
To enable customers to sign into the application using their GitHub account, execute the function below when they click the Sign in button. The function redirects the user to GitHub, where they can authorize or grant permission to the application and then sign into the application:
Admin users can sign into the application using an email and password. Appwrite validates the credentials before granting access to the application’s dashboard.
Appwrite also allows you to fetch the current user’s data. For instance, if only authenticated users can make payments, you can do this by running the code snippet below. It retrieves the current user’s data or returns null if the user is not logged in.
How to add Stripe payment checkout to Next.js
In this section, you’ll learn how to implement a Stripe payment checkout in the application. Stripe is a popular online payment processing platform that enables you to create products and integrate both one-time and recurring payment methods into your application.
First, you need to create a Stripe account. You can use a test mode account for this tutorial.

Click on Developers from the top menu and copy your secret key from the API keys menu.

Paste your Stripe secret key into the .env.local file.
Install the Stripe Node.js SDK.
Next, create an api folder within the Next.js app folder. The api folder will contain all the API routes and endpoints for the application.
Create a checkout endpoint by adding a checkout folder within the api folder.
Copy the code snippet below into the route.ts file.
The code snippet above creates a checkout endpoint that accepts POST requests. It creates a checkout session for the customer and returns the session URL.
The cancel_url and success_url determine where to redirect the user after completing or canceling a payment.
Finally, you can send a customer’s cart to the /checkout endpoint when a user decides to make payment for products by running the code snippet below:
The code snippet above saves the cart to the browser’s local storage and sends it to the API endpoint, then retrieves the response (session URL) from the backend server and redirects the user to the Stripe checkout page.

Sending in-app and email notifications with Novu
Novu is the first notification infrastructure that provides a unified API for sending notifications through multiple channels, including In-App, Push, Email, SMS, and Chat.
In this section, you’ll learn how to add Novu to your application to enable you to send email and in-app messages.
First, install the required Novu packages:
When users make a purchase, they will receive a payment confirmation email, and the admin user also receives an in-app notification.
To do this, you need to create an account on Novu and set up a primary email provider. We’ll use Resend for this tutorial.
After creating an account on Novu, create a Resend account, and select API Keys from the sidebar menu on your dashboard to create one.

Next, return to your Novu dashboard, select Integrations Store from the sidebar menu, and add Resend as an email provider. You’ll need to paste your Resend API key and email address into the required fields.

Select Settings from the sidebar menu and copy your Novu APIkey and App ID into a .env.local file as shown below. Also, copy your subscriber ID into its field – you can get this from the Subscribers section.

Finally, add the Novu notification bell to the Admin dashboard to enable admin users to receive notifications within the application.

How to create notification workflows with Novu
With Novu you can build code-first workflow engine that enables you to create notification workflows within your codebase. It allows you to integrate email, SMS, and chat template and content generators, such as React Email and MJML, into Novu to create advanced and powerful notifications.
In this section, you’ll learn how to create notification workflows within your application, use email notification templates with Novu, and send in-app and email notifications with Novu.
Install React Email by running the following command:
Include the following script in your package.json file. The --dir flag gives React Email access to the email templates located within the project. In this case, the email templates are located in the src/emails folder.
Next, create an emails folder containing an email.tsx within the Next.js app folder and copy the code snippet below into the file:
The code snippet above creates an customizable email template using React Email. You can find more easy-to-edit inspirations or templates. The component also accepts a message, subject, and name as props, and fills them into the elements.
Finally, you can run npm run email in your terminal to preview the template.
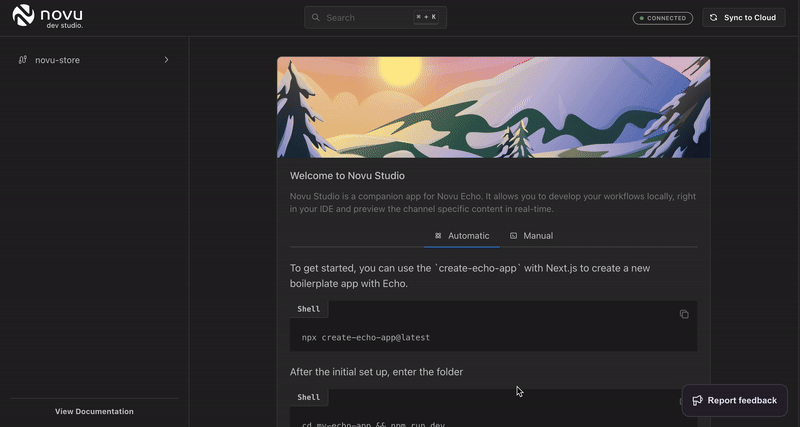
Next, let’s integrate the email template to Novu Echo. First, close the React Email server, and run the code snippet below. It opens the Novu Dev Studio in your browser.
Create an echo folder containing a client.ts file within the Next.js app folder and copy this code snippet into the file.
The code snippet defines a Novu notification workflow named novu-store, which accepts a payload containing the email subject, message, the customer’s name and the total amount.
The workflow has two steps: in-app and email notification. The in-app notification sends a message to the Admin using the notification bell and the email sends a message to the customer’s email.
Next, you need to create an API route for Novu Echo. Within the api folder, create an email folder containing a route.ts file and copy the provided code snippet below into the file.
Run npx novu-labs@latest echo in your terminal. It will automatically open the Novu Dev Studio where you can preview your workflow and Sync it with the Cloud.

The Sync to Cloud button triggers a pop-up that provides instructions on how to push your workflow to the Novu Cloud.

To proceed, run the following code snippet in your terminal. This will generate a unique URL representing a local tunnel between your development environment and the cloud environment.
Copy the generated link along with your Echo API endpoint into the Echo Endpoint field, click the Create Diff button, and deploy the changes.
Congratulations! You’ve just created a Novu workflow from your codebase.

Finally, let’s create the endpoint that sends the email and in-app notifications when a user makes a payment. Create an api/send route and copy the code snippet below into the file:
The endpoint accepts the customer’s email, name, and total amount paid, and triggers the Novu notification workflow to send the required notifications after a payment is successful.
Conclusion
So far, you’ve learned how to do the following:
- Implement multiple authentication methods, store, and retrieve data and files from Appwrite.
- Create email templates with React Email, and send in-app and email notifications with Novu.
If you are looking forward to sending notifications within your applications, Novu is your best choice. With Novu, you can add multiple notification channels to your applications, including chat, SMS, email, push, and in-app notifications
The source code for this tutorial is available here: https://github.com/novuhq/ecom-store-with-nextjs-appwrite-novu-and-stripe
Thank you for reading!


